
Introduction
Recently, out of boredom, I simply added a View Counter (aka. page views) to my blog posts. Here's a quick share and record of how I did it.

I've actually wanted to do this for a long time. I know many popular themes for static site frameworks like Hexo already have article view count statistics (e.g., LeanCloud) built-in.
However, my blog is primarily Ghost-based, so I wondered if there were any alternative solutions, preferably open-source, privacy-first, secure, and lightweight.
Originally, I also used Google Analytics (GA) to track some traffic, but GA is essentially a backend tool for overall statistics and analysis, and it can't easily display statistics directly on the page.
So, on a whim, I started thinking about it.
Though, to be fair, displaying view counts does, to some extent, go against privacy records or tracking principles, haha. But sometimes, I'm just curious to see how many times my articles have been viewed.
Goatcounter
After some research, GoatCounter seemed like an excellent choice. It's lightweight, mostly free, and you can self-host it if needed.
GoatCounter is an analytics service that provides a basic and clean API. Once set up, you only need to write some simple HTML and configure a few CORS settings to read and track page views.
Many thanks to the service provider @arp242 for offering such a service (_ _). If you're interested in his insights and philosophy, you can get a glimpse from his article Why I made GoatCounter.
Here's a simple share of how I implemented it on my blog with GoatCounter. It's not limited to Ghost; it can be used on any general webpage with pure JS + HTML.
Integration Guide
1. First, go to the GoatCounter official website and register an account.
The ID is crucial during registration, as it will be the URL used for website tracking and identification.
If you've just registered for the first time and no data is being tracked yet, GoatCounter will provide some guidance, asking you to embed a simple JS snippet into your website.
<script data-goatcounter="https://<your-id>.goatcounter.com/count" async src="//gc.zgo.at/count.js"></script>
How this is handled depends on your web framework. For Ghost, it can be easily done using the provided Code Injection feature.
2. Validation & Start statistics
Once the JS is set up, try opening an article and refreshing the page to start collecting data.
Once data starts being received, navigate to the GoatCounter dashboard (https://<your-id>.goatcounter.com/)
and your page view statistics will be displayed.
If you don't see any data coming in, check if you have any Adblock / ad-blocking software enabled.
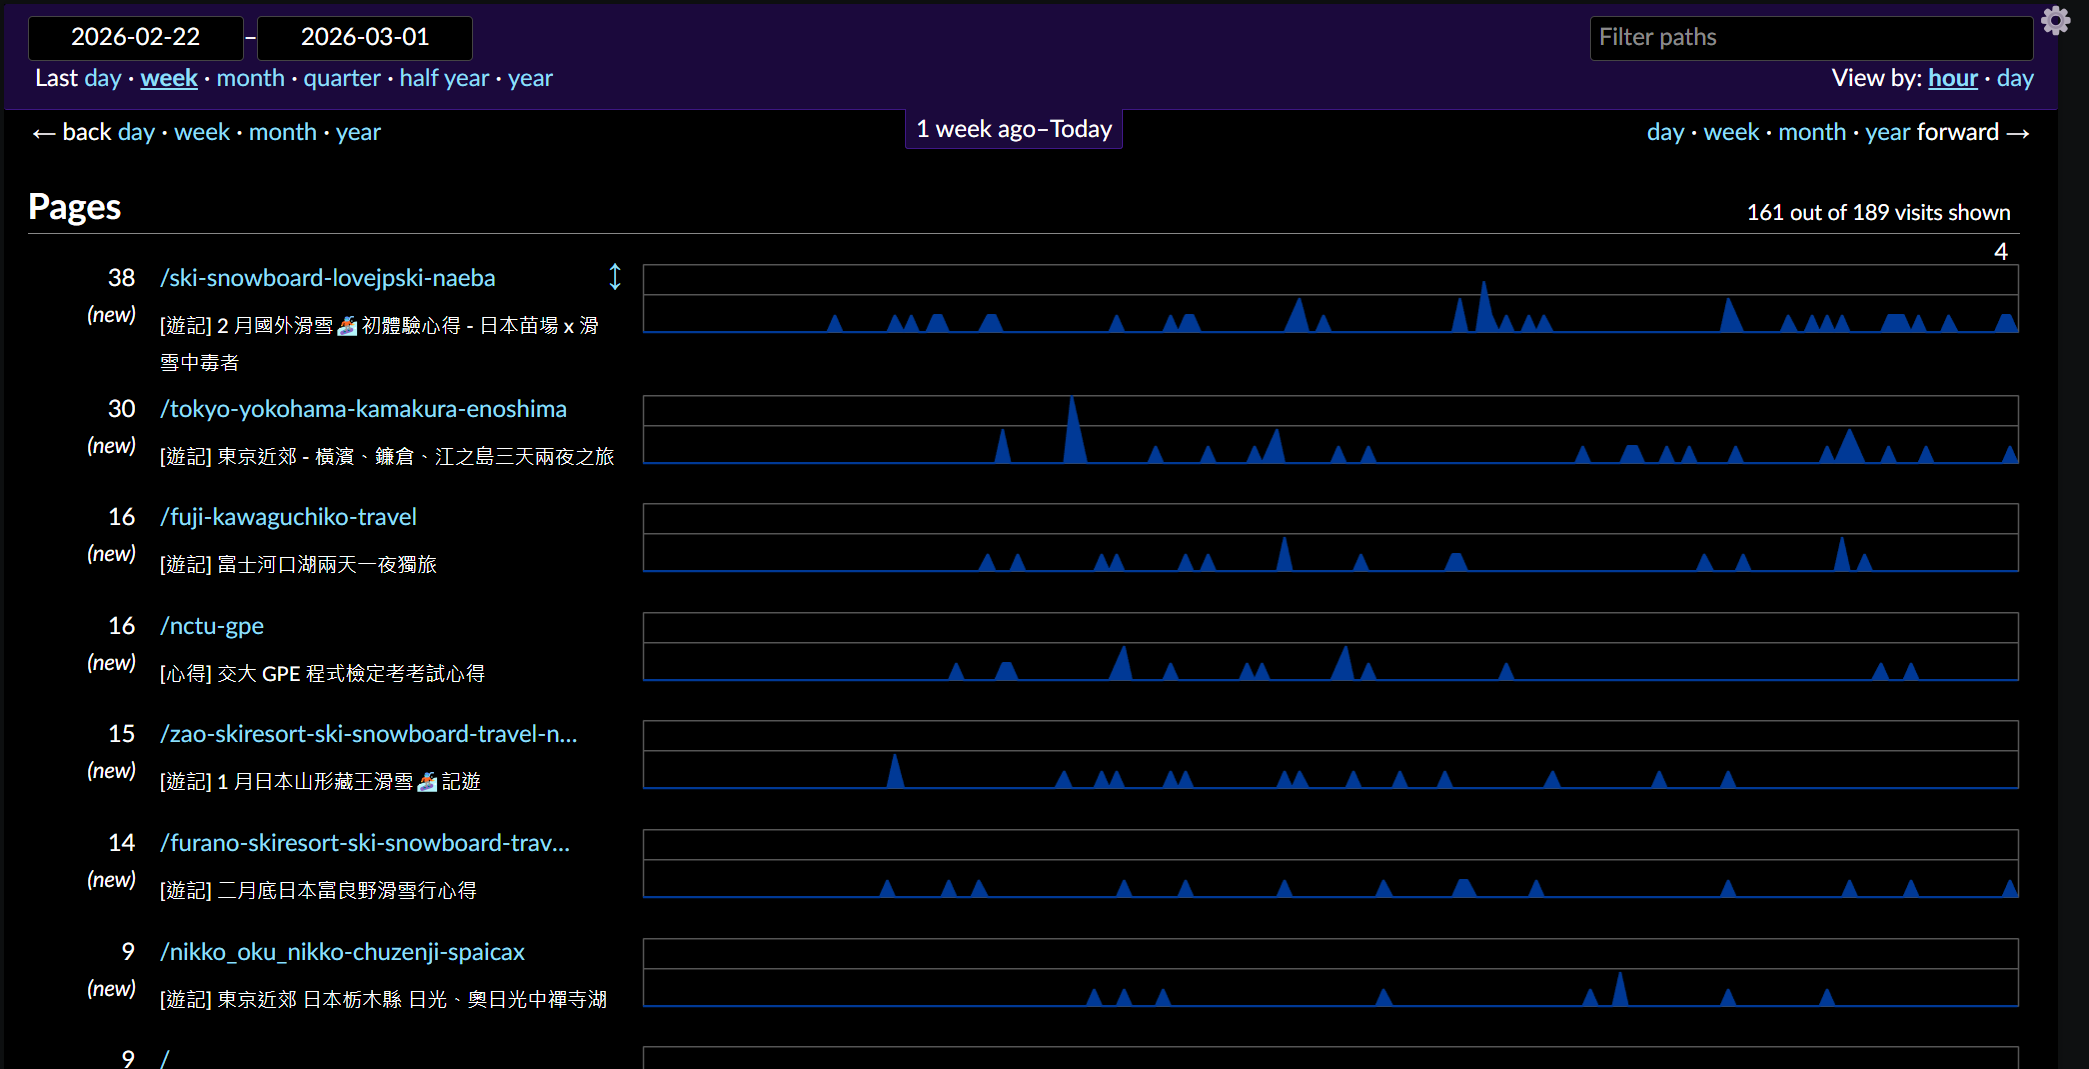
Up to this point, if you only want to track your article view counts purely in the backend, you're all set. It's really that simple.
However, if you want to render the view count on the frontend, you'll need to enable some additional security settings.
Therefore, the following steps are optional.
3. Enable Allow adding visitor counts on your website Settings (Optional)
Go to the Settings page in your GoatCounter dashboard. In the upper left corner, enable the Allow adding visitor counts on your website setting.
This is primarily to allow your frontend to fetch and render statistics from the GoatCounter API later on.
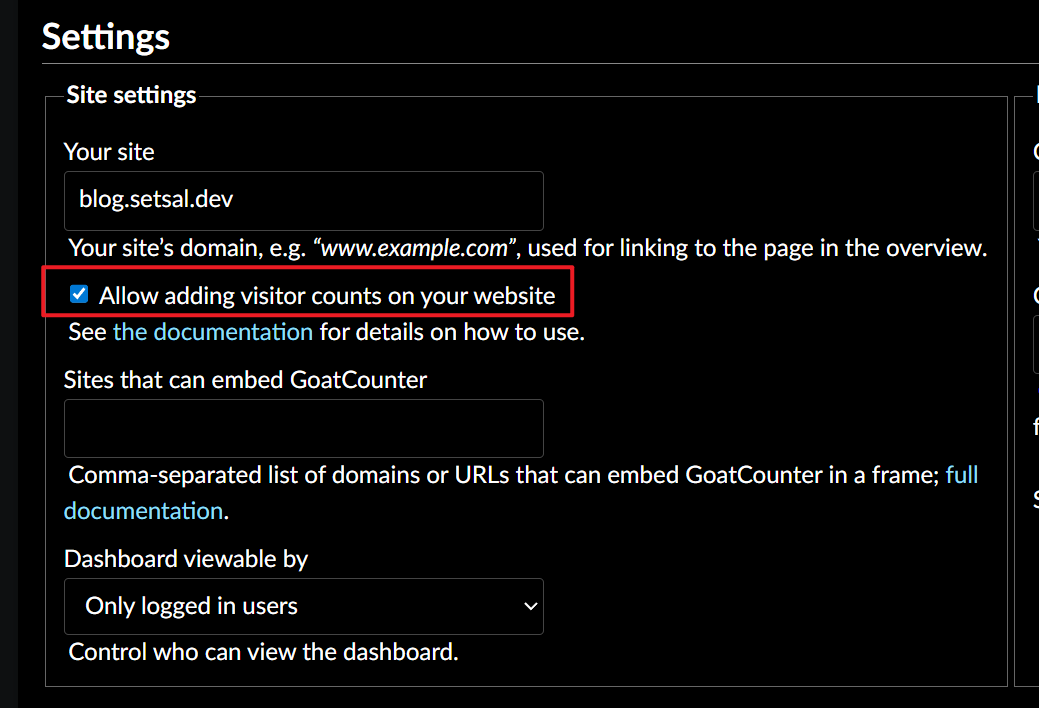
By default, it's off. If you only want to see data in the GoatCounter dashboard, this option doesn't need to be enabled.
There are some security considerations, as enabling it means some of your website's statistical data will be publicly readable (since it needs to be read and rendered on the user's end).
4. Set up Site's Domain to prevent CORS issue
There's another crucial setting on the Settings page:
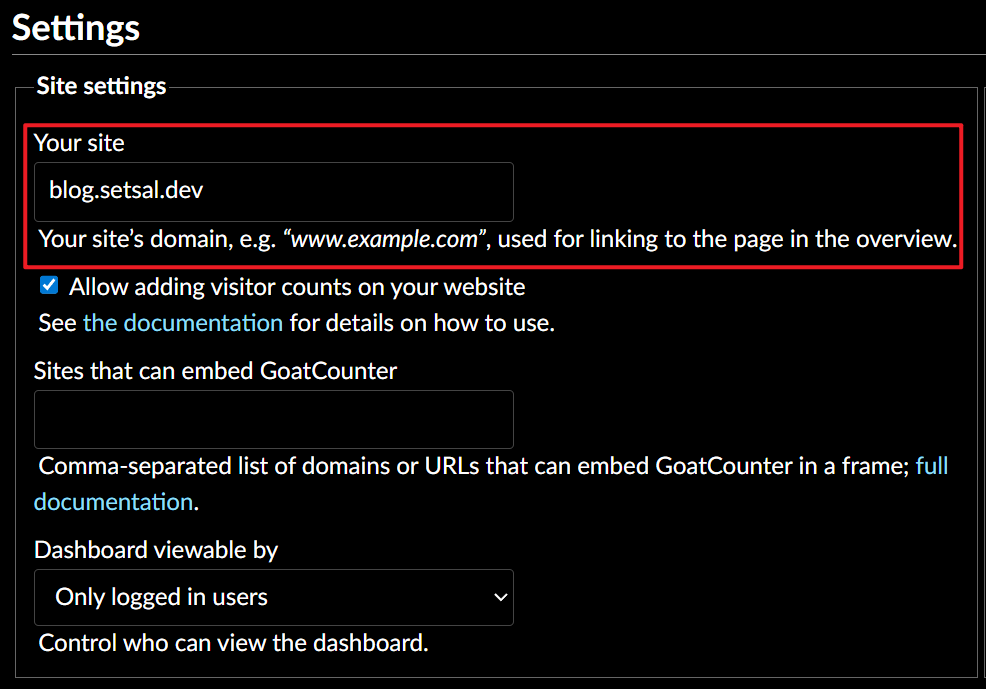
In the Your site field, you need to enter your website's domain name.
Otherwise, you'll encounter CORS protection issues, causing JS fetch requests to be blocked.
5. Render the view counter statistics in your post
Once all the above steps are prepared, we can proceed to render the information on the frontend.
GoatCounter provides a simple API that can easily fetch page view statistics.
https://${your-id}.goatcounter.com/counter/${encodeURIComponent(path)}.json
Therefore, we can write a very simple HTML snippet with JS to embed in the page.
The steps involve:
- Request the GoatCounter API to check if there's statistical data for the page.
- If data exists, display it on the frontend; otherwise, hide it (Progressive Disclosure).
- Then, use some HTML and CSS to style and beautify it (adding icons with Font Awesome).
A simple example is as follows:
HTML
An HTML snippet with default style adjustments, hidden by default until data is loaded.
<span id="views-container" class="article-meta-item" style="display: none;">
    <i class="fa fa-bar-chart" style="margin-right: 2px;"></i>
    <span>Views: </span>
    <span id="stats-views"></span>
</span>
JS
Requests the GoatCounter API to fetch view counts and displays them on the page.
    <script>
        (function () {
            const goatCounterCode = '<your ghost id>';
            const path = window.location.pathname;

            const viewsValue = document.getElementById('stats-views');
            const container = document.getElementById('views-container');

            if (viewsValue && container) {
                fetch(`https://${goatCounterCode}.goatcounter.com/counter/${encodeURIComponent(path)}.json`)
                    .then(response => response.json())
                    .then(data => {
                        if (data && data.count > 0) {
                            viewsValue.innerText = data.count.toLocaleString();
                            container.style.display = 'inline';
                        }
                    })
                    .catch(err => { });
            }
        })();
    </script>
And that's how you achieve the effect shown below!

Conclusion
This fills a gap for a feature I've always wanted. Many thanks to those who provide these services, allowing me to easily achieve my goals 😇
That's all for this article. See you in the next one, if fate allows~